How to Put a Baby Lock on Vertical Drawers
And then far, I've built three dissimilar sections of vertical drawers in my workshop. All the drawers in each sections are spaced as so the drawer fronts are the same size but I built each drawer based on what I wanted to store in it. I love, love Dearest existence organized and knowing exactly where to find what I want! On Mon I gave you lot a sneak peek at some of my workshop organization and sharedhow to install vertical storage drawersin existing cabinets. Today I'm showing you my drawers!
I'thousand partnering with SPAX to bring you this tutorial.

Edifice Vertical Drawers
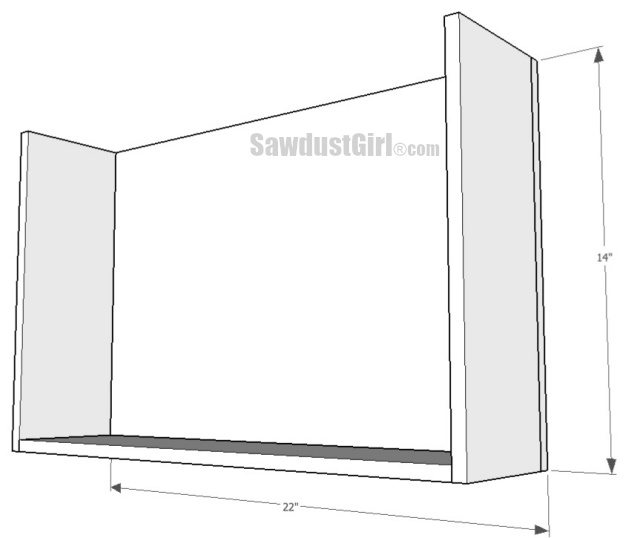
All of my cabinet sections are the same acme and depth so the height and depth of all the vertical drawers are the aforementioned. The width of the drawers vary per section. If you are building vertical drawers for an existing cabinet, you lot'll take to plan your drawers based on the infinite you accept. To give you an thought how I came up with my dimensions, hither's how I figured my depth and acme:
- My cabinet is 24″ deep but I'm using 22″ drawer slides. My drawer slides are mounted on the side of the cabinet flush with the front and back of the drawer — so my drawer needs to be 22″ long (deep).
- My cabinet opening is 15 1/two″ tall. I wanted 1/2″ space beneath my drawer and 1″ in a higher place it so my drawer is 14″ alpine.
- The drawer width is adamant by dividing the width of your cabinet opening upwards past the number of drawers you want. Then y'all besides have take into account the width of the vertical dividers yous need to install each drawer and drawer slide for each drawer. My dividers were 3/iv″ broad and my drawer slides crave ane/2″ installation infinite.
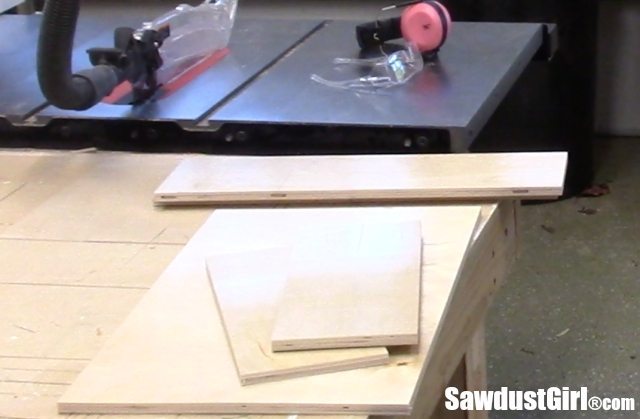
 Once I roughly determined what I wanted to shop in each section, I adamant how broad to build my vertical drawers and The I was able to cut out my pieces.
I used 1/2″ plywood for all my vertical drawers. With 1/2″ material, I use SPAX #6Hardwood and MDF screws. The reason I like SPAX screws is considering you don't have to drill a pilot hole or countersink. The threads are serrated which foreclose splitting without pre-drilling and the underside of the trim head has cutting ribs that allow you to drive the spiral affluent or countersunk.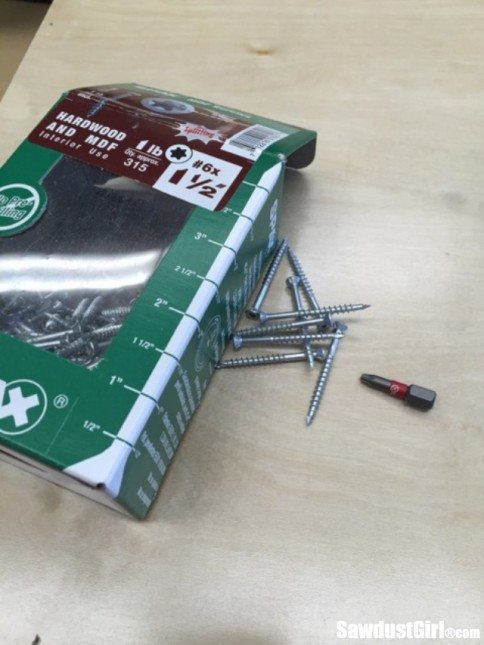
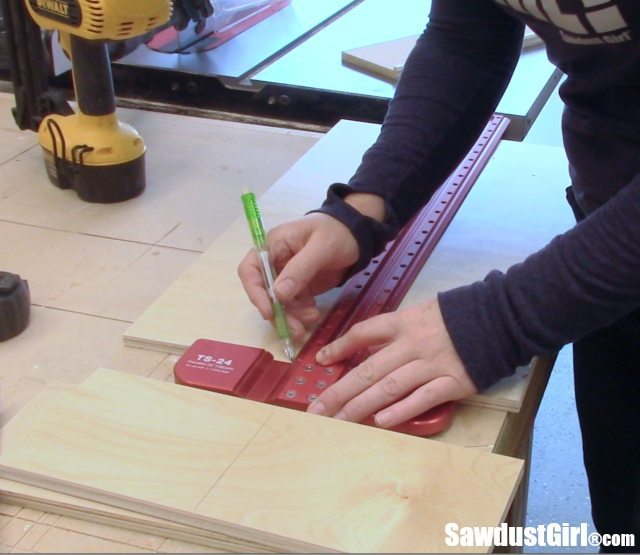
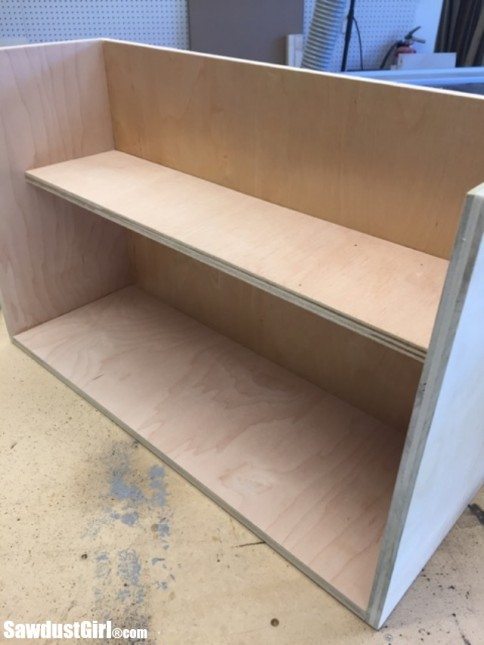
Information technology's e'er easier to mark the location of any center shelves on the front and dorsum of the pieces they will be attached to before y'all showtime building. I utilise a record measure to mark and and so transfer that mark along the length of the back with a long T-Square.
Then adhere the front end and back pieces.Bessey 90º angle clamps are great for holding cabinet parts square while you lot drive your screws.
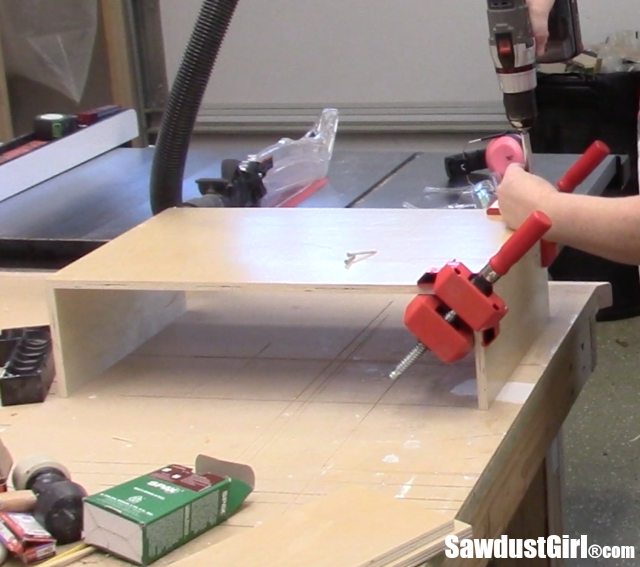
For 14″ alpine drawers, I used three screws on each side.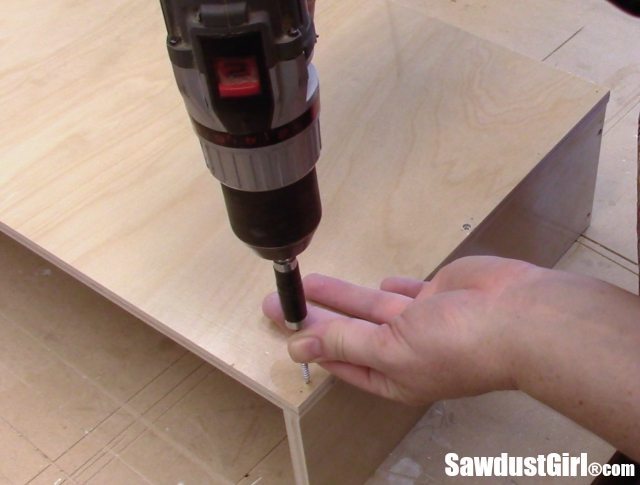
I installed my eye shelf and bottom with more #6 screws. Ii screws on each side of each shelf.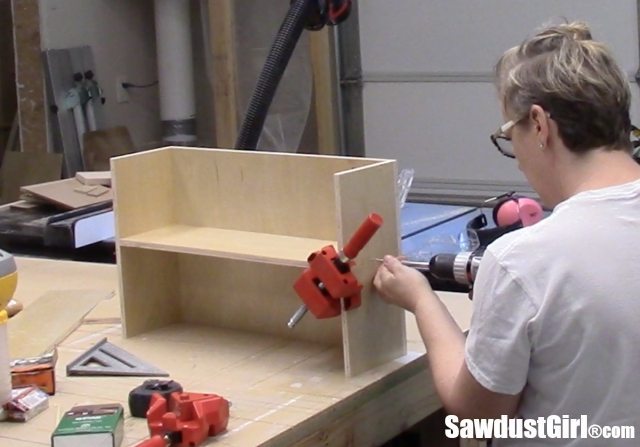
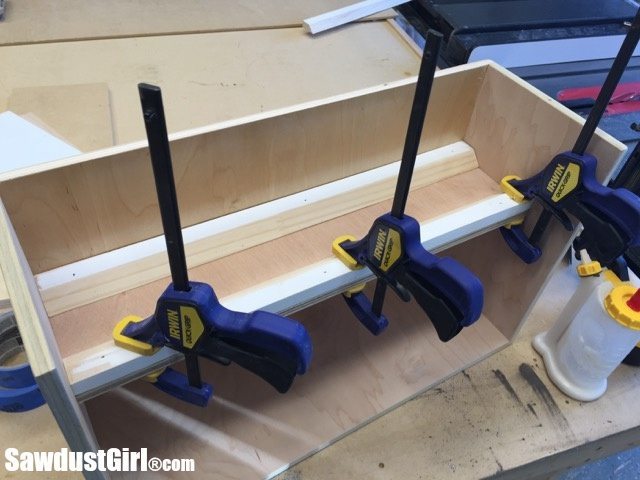
I decided I needed to add a "lip" on the front of both of these shelves to help keep things in place on the shelves. I used woods mucilage and clamped the two pieces together while I shot in some nails so I could and then remove the clamps and movement on with the side by side drawer.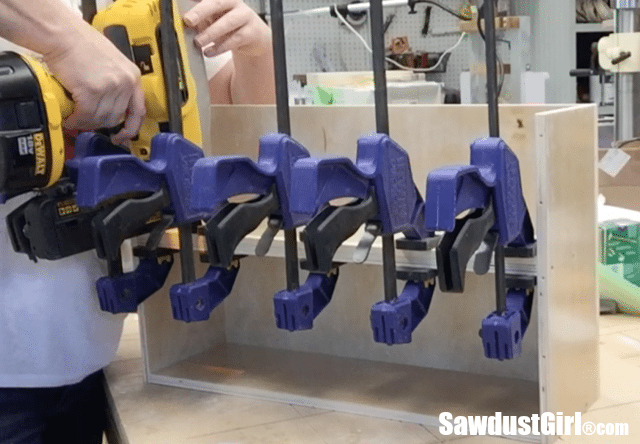
Attaching the front lip on shelves is way easier if y'all do it earlier you build the drawer!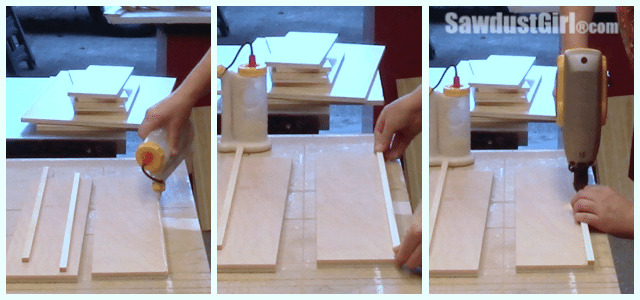
I make sure to sand all the edges and corners so they are polish to the impact. I hate abrupt corners.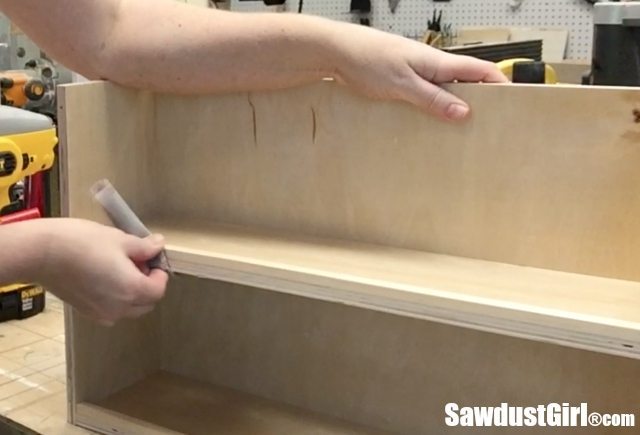
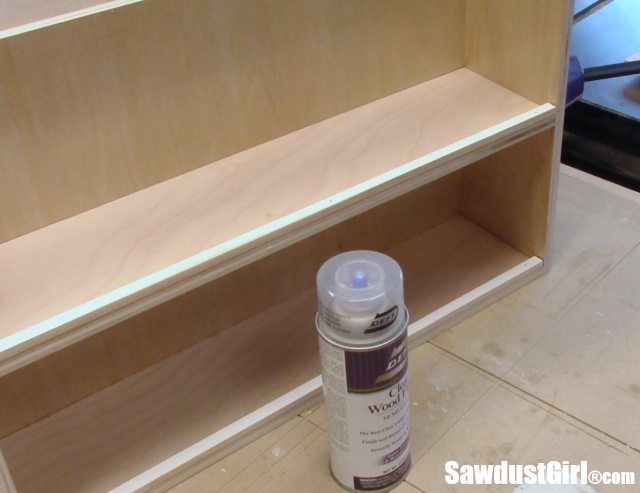
I clearcoated the bare plywood. Some of the plywood I used was pre-finished with a semi gloss clearcoat and I wanted information technology all to take the same sheen and protection then I sprayed the blank wood and edges withDeft.
These are the drawers I build for the 4 drawer section which holds all my screws!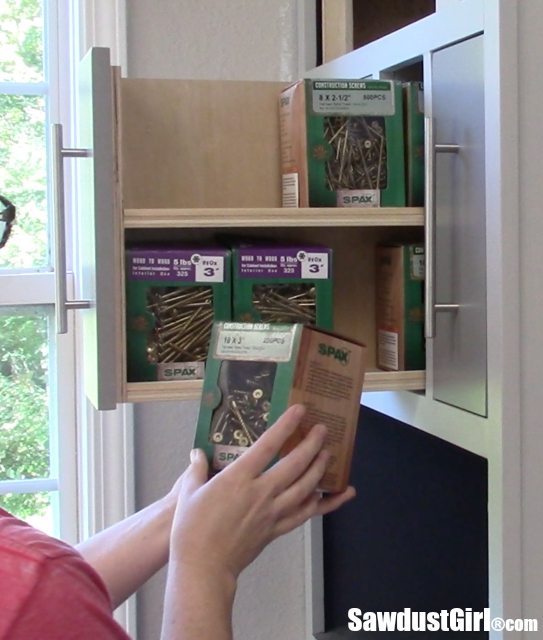
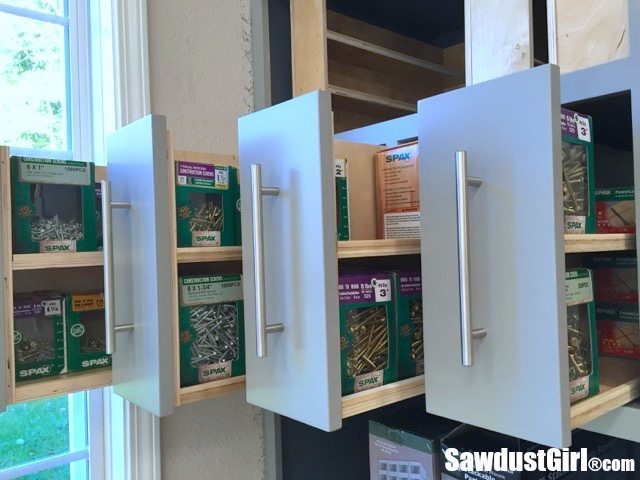
Steel Bar Pulls from DLawlessHardware.com
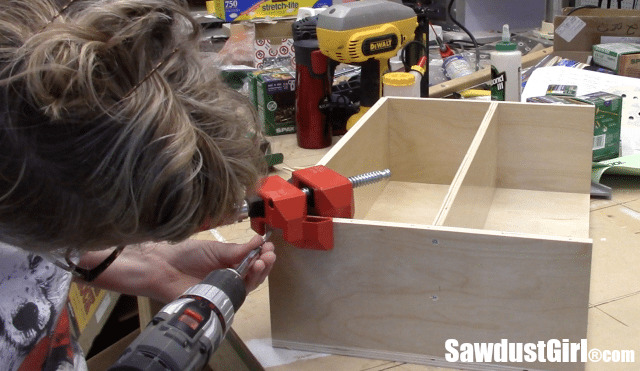
The section below that includes iii drawers. Ane is similar to the screw drawers where the shelves are equal depth. This drawer holds all my nails for my boom guns.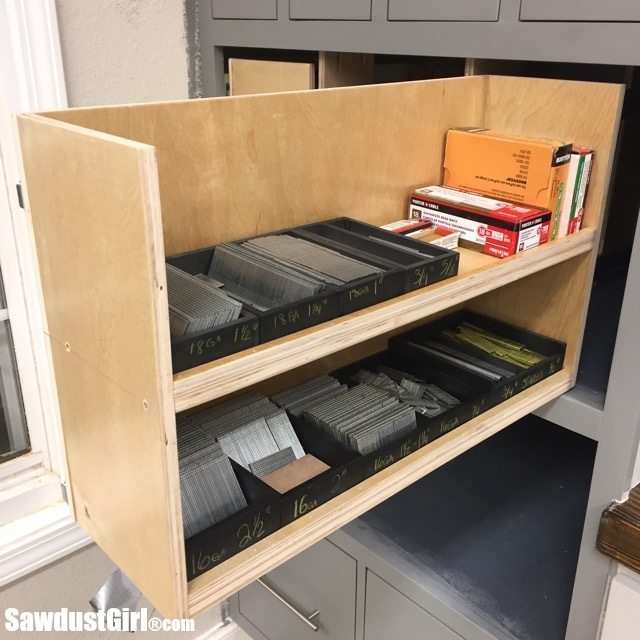
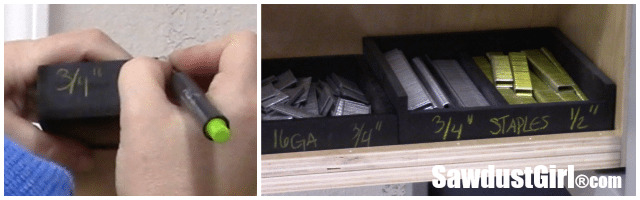
I also built some MDF boxes and painted them with chalkboard paint and then I could label the boxes simply alter things up in the time to come if needed.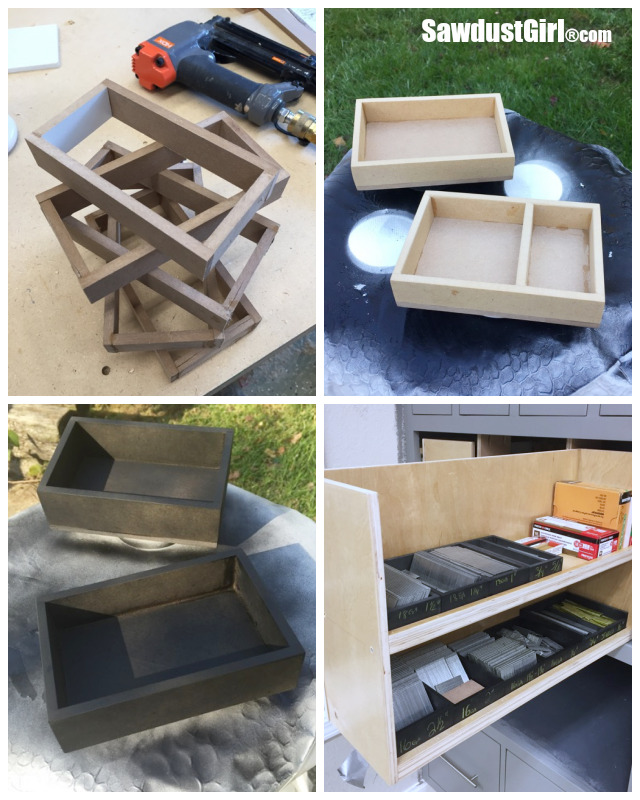
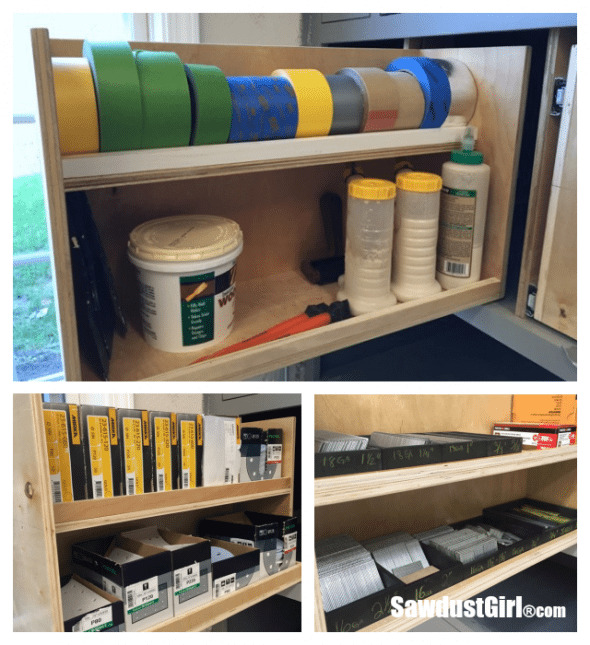
The other two drawers in this section vary slightly in that the middle shelf is more narrow than the bottom.
I of them holds my wood glue, wood filler and respective spreading tools on the lesser and rolls of record on the top.
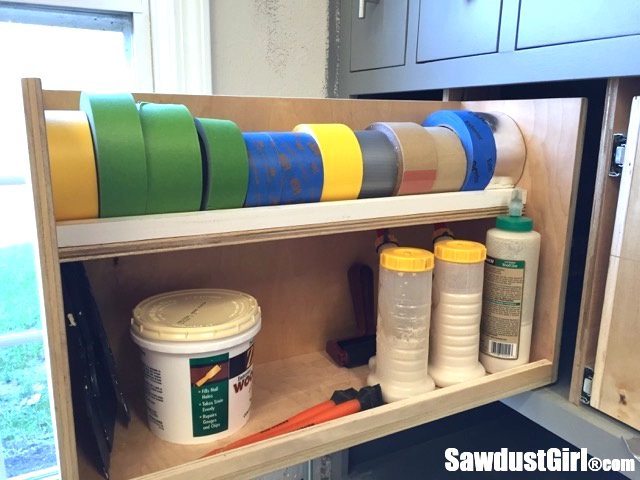
I was trying to effigy out the best manner to store the tape without having to move annihilation but the curl I desire (i.eastward. using a dowel) when I picked upwards a chip of wood off my workshop floor and it hit me! The scrap was a slice of primed pino that I'd ripped at a 45º angle – the solution was clear.
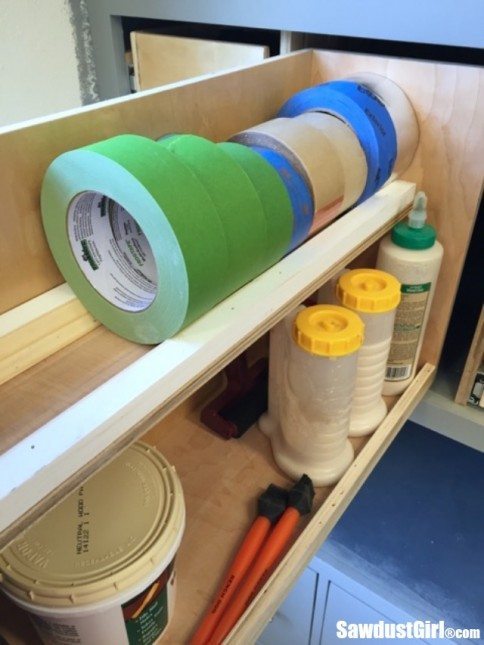 Perfect!
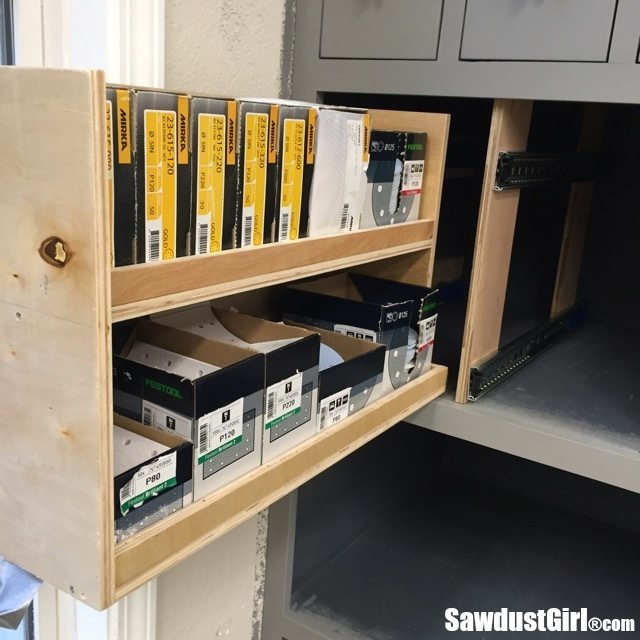
The other drawer in this department is for my orbital sandpaper.
I played around with spacing of the shelves both in acme and depth to make sure I created the best space to be able to catch any piece of sandpaper I wanted without lifting or moving anything else out of the way start. Information technology may look odd only the bottom shelf sticking out like this created the perfect clearance for the lesser boxes of sandpaper.
The rectangular boxes fit perfectly on the bottom shelf and the square boxes fit on either shelf. I put a small cake of wood behind them when they are on the lesser shelf to push them all the way to the front for convenience of sandpaper retrieval.
The top department of vertical drawers has 5 drawers and they are all different. The first one has three shelves and holds my small-scale cans of stain and my DIY stain color sample fan.

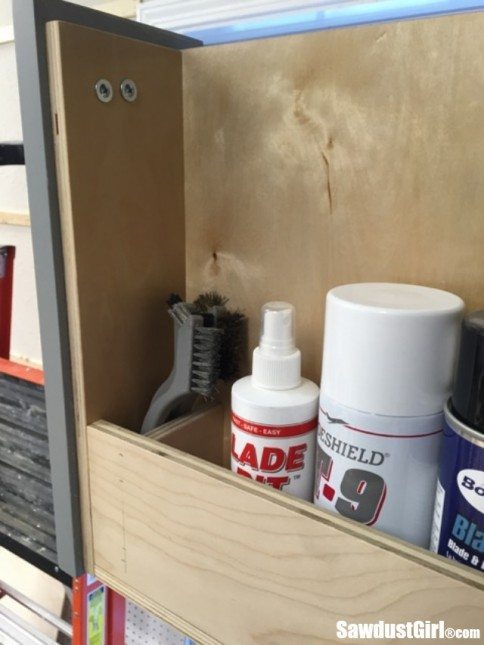
Another of these narrower drawers holds cans and bottles of cleaners.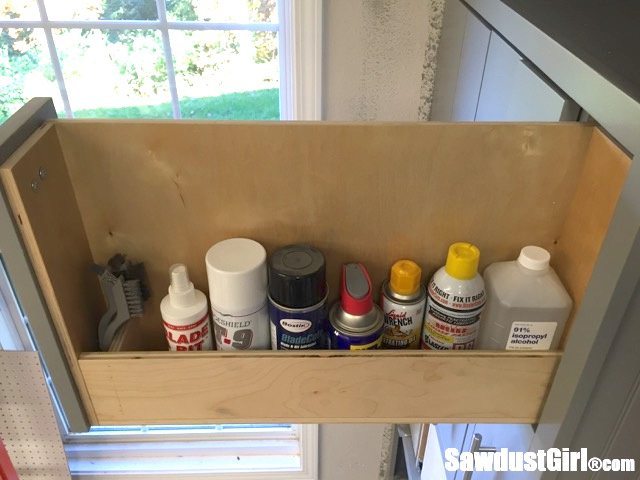
I added a small divider to keep the brushes from falling over and getting lost backside the cans. (You want to install your drawer front and pull earlier installing this divider.)
The concluding three drawers in this section utilize dowels to continue things on the shelves but allow me to see the total face up of the items stored. The starting time one also has a shelf higher up the cans for additional small cans of pigment or stain.
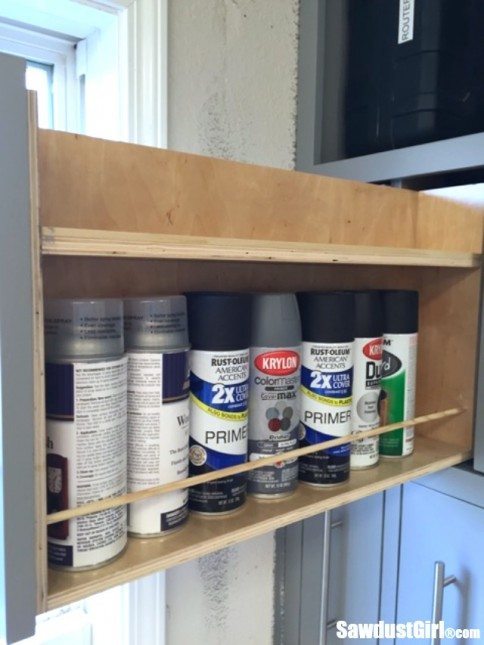
I installed the dowel to a higher place in this drawer so I could store taller items (like tubes of caulk) and go along them from falling out only I must non have been paying attention when installing the drawers and faceframes because this drawer concluded upward right next to the other spray paint drawer so I HAD to put the balance of the spray paint I had in this drawer…
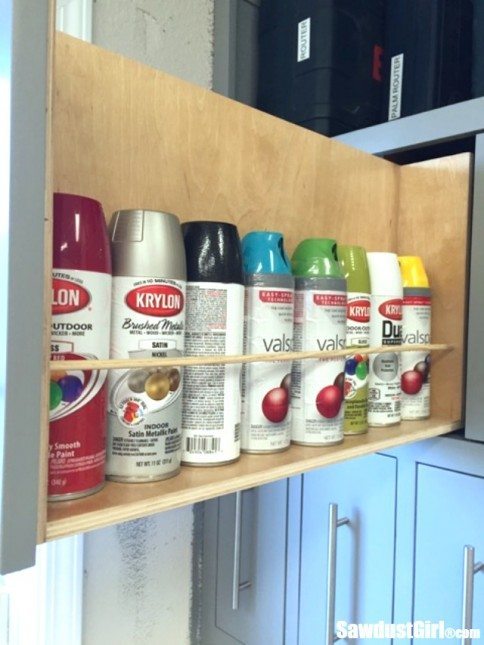
…even though the tubes of caulk some extra supervision! I can't store caulk in between two drawers of spray paint. I just tin't practice that. I do need to add together some parental guidance in this drawer though because when I pull it open all the tubes rock and sway and fall over on top of each other and at least 1 slides out under the rail. (I don't open it that often so I haven't fixed it yet.)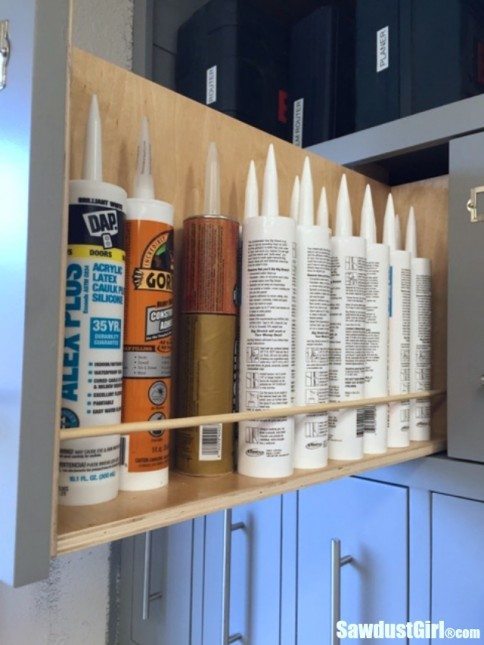 Building the dowel drawers is easiest if you drill the dowel holes earlier you assemble the drawer. I stack the 2 side pieces and drill completely through them both.
Put a piddling forest glue in the hole before you feed the dowel through and information technology should stay put.
But just in case, I glued a picayune block on the dorsum of the side that will face the back of the chiffonier (and so it will never exist seen.) The faceframe will cover the front of the drawer ensuring the dowel doesn't ever slip out the forepart side so you're definitely set with this programme.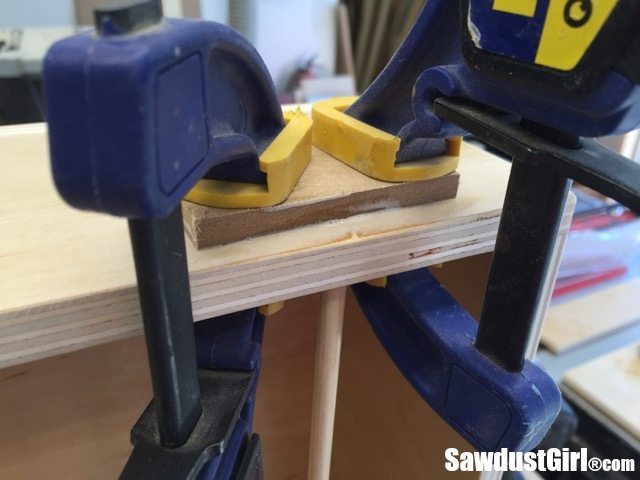
And that my friends is all my organized storage in the vertical drawers I have build. I have plenty of spaces left to fill but I oasis't been able to figure out how all-time to make use of that remaining space. At some signal a storage demand will arise and I'll effigy out how to go along. Until that inspiration hits I'm going to "put a pin" in the workshop system project. I have something else I KNOW what to do with and so I'll become work on that for a while.
v Drawer Department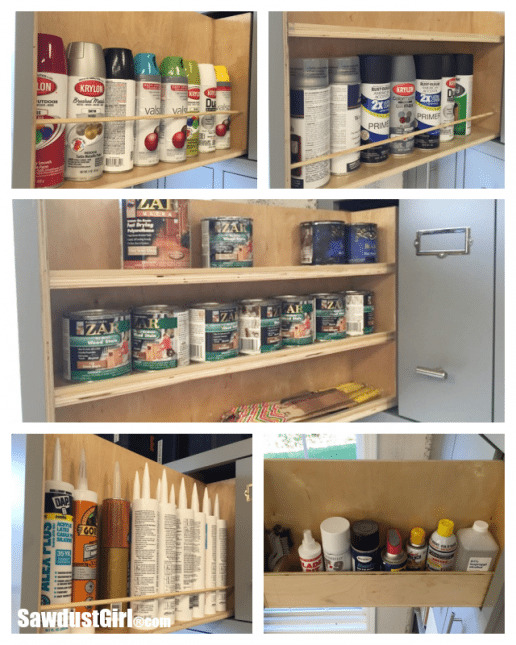
iv Drawer Section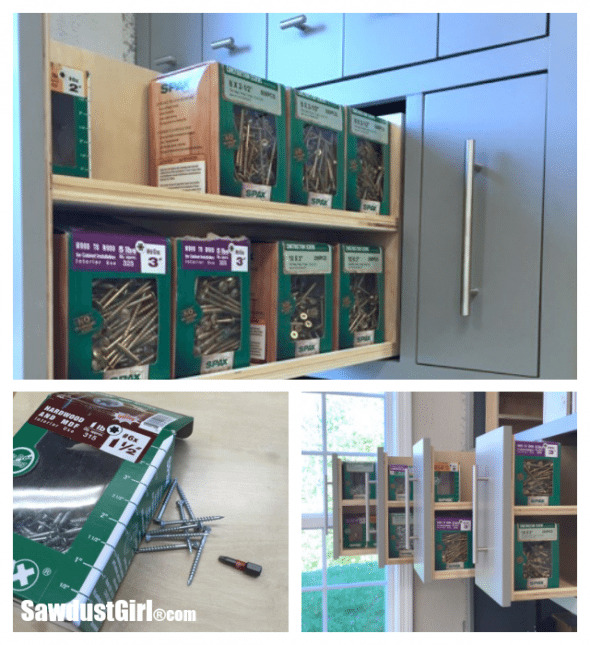 3 Drawer Section
This post is sponsored by SPAX. I received production and compensation for my work. All ideas and opinions are my own.
Source: https://sawdustgirl.com/build-organized-vertical-storage-drawers/
0 Response to "How to Put a Baby Lock on Vertical Drawers"
Enregistrer un commentaire